

Views: 0 Author: Site Editor Publish Time: 2026-09-18 Origin: Site


Countertop clutter and limited square footage in compact environments demand a shift from horizontal to vertical storage solutions. Standard freestanding tissue boxes consume valuable surface area on vanities, desks, and kitchen islands. They are highly susceptible to water damage, as cardboard absorbs moisture rapidly from wet surfaces. They also lack the stability required for seamless, one-handed dispensing, forcing you to hold the box down while pulling a tissue. Moving these dispensers off the counter solves these issues instantly. You reclaim space, protect the paper from moisture, and gain a rigid dispensing point. We will look at the technical criteria for selecting the right unit for your space. This includes evaluating installation constraints, material durability, load capacity, dispensing efficiency, and aesthetic integration. Getting these factors right ensures a functional, long-term setup that actually works in tight spaces.
Installation Viability: Assess surface material and porosity before selecting a wall-mounted punch-free tissue box to prevent adhesive failure and unit detachment.
Dynamic Load Capacity: A true load-bearing tissue storage box must support not only the static weight of the unit and tissues but also the dynamic pulling force exerted during extraction (typically 5–10 lbs of resistance).
Dispensing Mechanics: Bottom-dispensing and pull-out wall-mounted tissue box designs minimize moisture exposure and optimize ergonomic access in confined overhead or under-cabinet areas.
Material Resilience & Aesthetics: High-impact ABS plastic and 304 stainless steel dictate longevity in high-humidity environments, while treated wood, brass, and rigid decorative frames provide aesthetic cohesion for dry spaces, vastly outperforming standard soft fabric covers in structural integrity.
A standard rectangular tissue box occupies roughly 30 square inches of horizontal space. On a compact 24-inch bathroom vanity or a crowded kitchen island, that footprint competes directly with daily necessities. In recreational vehicles, micro-apartments, and clinical exam rooms, you simply do not have surface area to spare. Moving the dispenser to the wall immediately reclaims this real estate. You open up room for hand soap, dental care items, or medical supplies, improving the overall workflow of the space.
Freestanding cardboard boxes also create hygiene and maintenance problems. Cardboard acts like a sponge. It absorbs ambient humidity from showers and direct water splashes from adjacent sinks through capillary action. Once the base gets wet, the structural integrity of the box fails. The tissues inside become damp, clump together, and end up in the trash. A wet cardboard base also traps moisture against the countertop, creating a breeding ground for mold and bacteria. This elevates cross-contamination risks, especially in food prep zones or medical facilities. Elevating the dispenser above the splash zone eliminates these environmental hazards completely.
One-handed dispensing stability is the primary functional metric for any mounted dispenser. When you pull a tissue, the friction of the interfolded paper creates upward and outward resistance. If the housing is not rigidly secured, the entire unit shifts. You then have to use your second hand to hold the box down, defeating the purpose of a mounted dispenser. A properly engineered mount isolates this kinetic energy. It neutralizes the force vectors so the unit remains completely stationary during rapid extraction.
Refill accessibility determines whether the fixture is actually usable long-term. Restocking needs to be a fast process. You should never have to dismount the primary housing from the wall just to put in a new box of tissues. Effective designs use drop-down bottom hinges, magnetic front faceplates, or sliding side panels. These mechanisms let you swap out empty boxes in seconds. The internal cavity also needs enough clearance to handle different tissue brands without forcing you to crush the cardboard refills to make them fit.
Tissue holders act as integrated architectural decor elements rather than just utilitarian plastic boxes. Matching specific interior styles means selecting the right materials and finishes. A modern minimalist bathroom looks best with matte black or brushed nickel metals. A farmhouse bedroom might call for finished wood or distressed brass. The fixture needs to blend with your existing cabinet hardware, faucets, and lighting fixtures so it looks intentional.
Do not try to use traditional decorative fabric covers or seasonal slipcovers for a wall-mounted setup. Soft fabrics lack the internal framing required to hold mounting hardware. They cannot provide the counter-resistance needed for one-handed dispensing. You need a rigid housing. A solid structure replaces soft covers, offering a permanent aesthetic that holds its shape regardless of how many tissues are left inside.
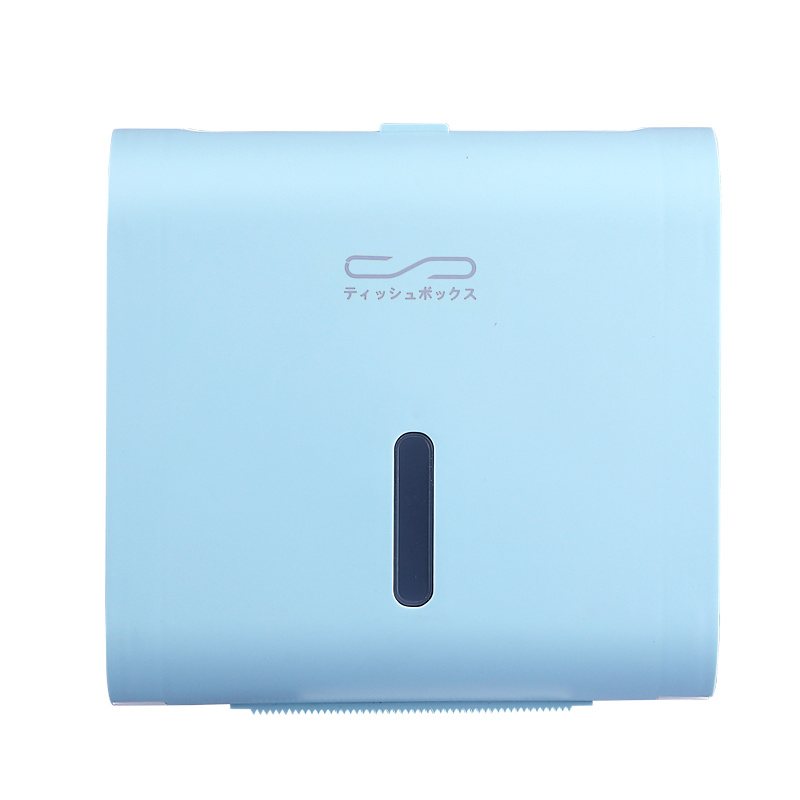
Punch-free installation mechanisms rely on high-bond acrylic adhesive pads or industrial vacuum suction cups. These systems distribute the weight of the unit across a wide surface area. They create a strong bond without penetrating the wall. The acrylic adhesive formulations resist moderate temperature fluctuations and humidity, making them highly effective when applied correctly.
A wall-mounted punch-free tissue box works perfectly in specific environments. Renters use them to upgrade their bathrooms without drilling holes and risking their security deposits. Temporary setups in dormitories or modular offices also benefit from this approach. However, you must install them on strictly non-porous surfaces. Glazed ceramic tile, tempered glass mirrors, flat stainless steel panels, and smooth fiberglass shower surrounds provide the airtight contact needed for maximum adhesion.
These systems fail on porous or textured surfaces. Do not use adhesives on painted drywall, textured tile, exposed brick, or wallpaper. Adhesives only bond to the top layer of paint or paper. When you apply weight and pull a tissue, the paint shears away from the drywall beneath, and the unit crashes to the floor. Textured surfaces prevent suction cups from forming a complete vacuum seal. Knowing your substrate prevents these installation failures.
Hardware-mounted systems use traditional mechanical fasteners. This includes stainless steel screws, wall anchors, and dedicated mounting brackets. This method physically anchors the dispenser into the structural framework of the wall or the dense core of your cabinetry. By driving screws into wood studs or using specialized drywall toggles, the mounting bracket achieves permanent rigidity. Ambient humidity or surface textures will not affect a mechanical fastener.
Permanent installations in commercial spaces, heavy-use households, and public restrooms require hardware mounting. These environments subject dispensers to aggressive handling and high daily extraction volumes. Hardware mounts are the only viable solution for porous or heavily textured walls where adhesives will fail. When installing on standard half-inch drywall without a stud, you must use threaded zinc anchors or toggle bolts. Plastic expansion anchors often pull out under the repeated dynamic stress of tissue extraction.
To execute a proper hardware installation, follow these exact steps:
Locate the wall stud using a magnetic or electronic stud finder to ensure maximum load-bearing capacity.
Mark the drill points using the provided mounting bracket as a template, ensuring the alignment is perfectly level.
Select the appropriate drill bit: use a masonry bit for tile or brick, and a standard wood bit for drywall and studs.
Insert the mechanical anchors flush with the wall surface before driving the stainless steel screws through the bracket.
Pull-out and inverted designs change the standard dispensing orientation. Instead of pulling tissues upward through a top slot, these units feature bottom-facing, angled, or sliding drawer dispensing slots. The internal mechanics use gravity or spring-loaded platforms to keep the tissue stack pressed against the dispensing aperture. This ensures the next tissue is always staged and ready for you to grab.
A pull-out wall-mounted tissue box is engineered specifically for under-cabinet mounting and overhead reach scenarios. You mount the unit flush beneath a kitchen cabinet or a bathroom floating vanity. The tissues dispense downward directly into your hand. This orientation provides excellent protection against top-down dust accumulation. It also shields the tissues from accidental water splashes, keeping the paper products completely isolated from environmental contaminants.
Mounting Style | Primary Mechanism | Ideal Surfaces | Key Limitation |
|---|---|---|---|
Punch-Free (Adhesive) | Acrylic adhesive pads / VHB Tape | Glass, glazed tile, metal, fiberglass | Fails on painted drywall and textured surfaces |
Hardware-Mounted | Screws, toggle bolts, wall anchors | Drywall, wood studs, masonry, brick | Requires power tools; leaves permanent wall damage |
Inverted / Pull-Out | Bottom-facing slots / Gravity feed | Under-cabinet, overhead shelves, floating vanities | Requires specific vertical clearance below the unit |
Engineering specifications for a load-bearing tissue storage box must account for two distinct forces: static weight and dynamic pulling force. Static weight includes the mass of the housing itself plus a full box of tissues. This rarely exceeds two pounds. However, dynamic downward and outward pulling force occurs during extraction. Depending on the friction of the dispensing slot and the speed of your pull, this dynamic force exerts 5 to 10 pounds of momentary stress on the mounting points.
Evaluating structural integrity requires inspecting the mounting bracket thickness and the backplate surface area. A larger backplate distributes mechanical stress over a wider section of the wall. This reduces the likelihood of anchor pull-out or adhesive shear. The connection points between the bracket and the primary housing must feature reinforced plastic gussets or welded metal joints. Weak connection points will cause the housing to snap off the bracket under heavy use, even if the bracket remains firmly attached to the wall.
High-humidity environments like bathrooms and kitchens demand materials that will not degrade, warp, or rust. Powder-coated aluminum and 304 stainless steel offer superior corrosion resistance. They ensure the finish remains intact despite constant exposure to steam and condensation. Do not use 430 stainless steel in bathrooms, as it lacks the nickel content required to prevent rust over time. For polymer-based housings, Polyethylene Terephthalate (PET) and Acrylonitrile Butadiene Styrene (ABS) provide exceptional moisture resistance. They also offer high-impact durability, preventing the unit from cracking if you accidentally strike it with a hairdryer or a heavy bottle.
Dry environments, such as home offices and bedrooms, allow for a broader range of decorative materials. Brass, copper, and finished wood align well with farmhouse or industrial interior designs. However, these materials require specific maintenance. You must properly seal wood to prevent warping from seasonal humidity changes. Unlacquered brass will develop a patina over time, which you may need to polish. Soft fabric covers remain structurally incompatible with rigid wall-mounting requirements. They cannot support their own weight or resist extraction forces.
Dimensional constraints dictate the practical usability of the tissue box holder. You must compare the internal cavity clearance against the specific tissue brands you use. Standard rectangular flat boxes typically measure 9 by 5 by 3 inches, while boutique cube boxes measure roughly 5 by 5 by 6 inches. Bulk commercial packs feature entirely different dimensions. If the internal cavity is too shallow, the cardboard refill will crush against the backplate. This restricts the tissues, increases friction, and causes them to tear during extraction.
Hinge clearance and loading orientation impact where you can install the unit. Front-loading mechanisms with drop-down doors require unobstructed space directly in front of the unit. Side-loading sliding panels demand lateral clearance. This makes side-loaders unsuitable for installation in tight corners or directly adjacent to door frames. Evaluating the spatial clearance required to execute a refill ensures the unit remains functional without requiring awkward maneuvering every time you run out of tissues.
Punch-free mounts detaching from the wall represent the most common installation failure. This risk elevates significantly in environments with high ambient humidity, rapid temperature fluctuations, or when you fail to observe proper adhesive curing times. When an adhesive pad fails, the unit falls. This can damage the dispenser, chip the countertop below, or cause injury.
Mitigating this risk requires strict adherence to surface preparation protocols. You must clean the mounting substrate thoroughly with 90% isopropyl alcohol. This removes all soap scum, skin oils, and dust. Do not use household cleaners, as they leave a residue that prevents bonding. Once you apply the adhesive, mandate a 24 to 48-hour cure time before attaching the housing or loading any weight. This curing period allows the acrylic polymers to fully bond with the microscopic pores of the tile or glass. Always adhere to the manufacturer's stated weight limits.
Rough slot edges, narrow apertures, or improper box alignment cause tissue shredding during extraction. If the dispensing bezel contains plastic flashing or sharp metal burrs, it will catch the delicate paper fibers. Furthermore, as the tissue stack depletes, the remaining tissues drop lower in the box. This increases the extraction angle and the likelihood of tearing.
Select holders featuring polished, rounded dispensing bezels. These allow the paper to glide smoothly at various angles. Advanced units incorporate internal spring-loaded platforms. These platforms maintain constant upward pressure on the tissue stack. They keep the top tissue firmly pressed against the dispensing slot regardless of how many tissues remain. This reduces friction and ensures a clean, tear-free pull every time.
Improper placement transforms a convenience item into an ergonomic hazard. A holder mounted too close to a vanity may block adjacent cabinet doors from opening fully. Units installed at head height in narrow walkways or beside toilets pose a collision risk. Protruding sharp corners on metal housings exacerbate this danger in confined spaces. Commercial spaces must also consider ADA compliance regarding how far objects can protrude from the wall.
Measure depth profiles prior to purchase. Utilize flush-mount or recessed designs where possible to minimize protrusion into the room. Before drilling holes or applying adhesive, physically hold the unit against the wall. Map the trajectory of all moving parts in the vicinity, including doors, drawers, and shower enclosures. Ensure the dispensing slot remains easily reachable without requiring users to stretch or bend awkwardly.
Audit the intended mounting surface for porosity and texture to determine if you need an adhesive pad or mechanical hardware mounting.
Measure the exact length, width, and depth of your preferred tissue refill brands to verify internal cavity compatibility before purchasing a unit.
Clean the installation surface with 90% isopropyl alcohol and enforce a strict 24-hour cure time for any adhesive applications before loading weight.
Map the swing path of nearby cabinet doors, drawers, and shower enclosures to prevent spatial interference and collision hazards.
A: High-quality punch-free adhesive mounts typically support between 5 to 10 pounds of static weight when properly installed on non-porous surfaces like glass or glazed tile. This capacity decreases significantly on textured surfaces or if you do not allow the adhesive a full 24-hour curing period before attaching the dispenser.
A: Most pull-out models accommodate standard rectangular boxes, but internal dimensions vary by manufacturer. Always measure your preferred tissue brand, which is typically 9 by 5 by 3 inches. Compare these measurements against the internal clearance specifications of the holder to prevent the cardboard from crushing during installation.
A: Apply heat using a hairdryer on a medium setting to soften the acrylic adhesive. Once warm, slide a piece of dental floss or fishing line behind the mounting pad and use a sawing motion to cut through the adhesive. Clean any remaining residue with rubbing alcohol or a citrus-based adhesive remover.
A: Adhesive mounts fail on painted drywall because the adhesive bonds to the paint, which peels away under weight. For painted drywall, you must use hardware mounting. Install appropriate drywall anchors or toggle bolts to ensure long-term load-bearing stability and prevent the unit from tearing out of the wall.
A: Tearing usually results from friction or an expanding gap as the box empties. Select a dispenser with a polished, rounded aperture. Look for models with internal spring-loaded platforms that continuously push the tissue stack toward the dispensing slot, maintaining optimal tension and reducing the extraction angle.
A: Yes. Fully enclosed housings made from ABS plastic or 304 stainless steel block ambient moisture. Bottom-dispensing inverted models work exceptionally well in bathrooms because their solid top surfaces protect the tissues from settling condensation and direct water splashes from adjacent sinks or showers.


